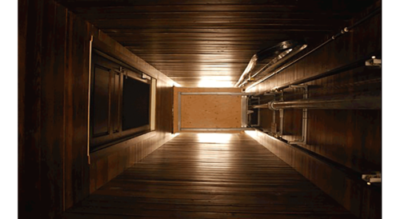
When working on a project which includes a home elevator or limited use limited application elevator, understanding the anatomy of the structure will assist in seamless construction. Whether an elevator is to be installed immediately or the elevator shaft (or hoistway) is being installed for an elevator to be added in the future, a comprehensive understanding of the components is necessary.
4 Parts of the Elevator Shaft
There are four basic parts of the elevator shaft:
- Pit
The elevator pit is the depression below the surface of the lowest landing that allows the elevator floor to be level with the floor of the lowest landing. The carriage or sling, which holds the car, consumes space below the floor of the car. This means that the material which is below the car floor must be recessed into the floor to provide proper leveling. The pit depth may need to be increased to provide a safe space under the car, intended to protect a technician while working under the car. The pit floor is a critical design element, because the majority of the force imposed by the elevator will be transferred to the pit floor. - Overhead
The overhead is the area from the top of the upper finished floor to the nearest overhead obstruction within the shaft. This space is required to provide a place for the elevator and its operational machinery when the floor of the car is level with the upper finished floor. Additional overhead may be required to protect a technician while working on top of the car. - Rail wall
Residential and limited use limited application (LU/LA) elevators are rated at lower capacity than commercial elevators and are typically a cantilever design. This construction applies force to a wall as well as to the pit floor. When the elevator is installed, guide rails will be anchored into backing within the wall, this wall is called the rail wall. The guide rails perform two primary functions; first to guide the elevator in a plane that is parallel to the entrances of the hoistway. The second is to provide a surface on which the car safeties can deploy. Adequate backing ensures stability in the function and wear of the elevator. - Hoisting beam
Some jurisdictions will require the installation of a hoisting beam at the top of the shaft. The hoisting beam can be used during installation to support, raise, and lower components of the elevator. It can also be utilized as a connection point for fall suppression devices used by elevator technicians. Because the requirements for each of these applications vary so greatly, the structural characteristics and installation of the hoisting beam should be discussed with the authority having jurisdiction and the elevator installation company.
Completing the Project
Upon completion of the hoistway, the construction can be inspected and then final touches can be applied. If you have questions about the construction process for a residential or LU/LA elevator, contact your local home elevator company. These individuals can assist in planning all phases of the elevator installation.


Need an elevator installed inside the church with the ability to gain entrance from a doorway connected to the church bldg.
Thank you for your interest in Symmetry Elevating Solutions. One of our team members has reached out via email for additional information. You may also find a Symmetry representative near you by completing our Find A Dealer form.
Also important to know that the Rail wall is Best on the Left or Right of the hoistway entrance side. This provides for a solid ride with less side to side or diving board action. Helpful info.